What Is the Difference Between Renovation, Remodeling, Restoration, and Refurbishment?

Renovation, remodeling, restoration, and refurbishment may seem synonymous, but they’re not. Each one has its own goals, requirements, and processes. Visit Brick Fences Perth for more information.

Choosing the right upgrades is essential to boosting your property value. However, some renovation projects can deter buyers, so you must be careful.

Setting a budget before beginning work is important for planning a renovation. This will help you stay within your spending limits, and it will give you a clear idea of what the final cost will be. It’s also a good idea to leave room in your budget for unexpected expenses. This will save you from making last-minute decisions that could push the project over budget.

The amount you spend on a renovation will vary depending on the complexity of your project and the size of your home. For example, a basement renovation will be more expensive than a kitchen renovation. The cost of materials also plays a role in the overall price. For example, choosing cheap flooring options may cost you more in the long run because they are prone to damage and require regular replacement. Similarly, premium materials may be more costly upfront but will last longer and provide a better look than lower-end alternatives.

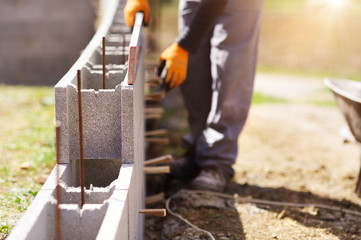
In addition to the cost of materials, you should factor in the cost of labor. While you can do some of the work yourself, hiring professional contractors for the more complicated projects is generally a good idea. This will ensure that the work is done correctly and by local codes.

You’ll need to find somewhere else to live during the construction process. This is because the construction can disrupt your daily routine. For instance, there will be times when the electricity or water is turned off and on, and noise levels may be high. In addition, some renovations make living in your home difficult or even impossible.

When renovating, planning the work, gathering the right materials, and starting the project takes a while. The timeframe can vary depending on the size of the renovation, the type of materials used, and the complexity of the design. Often, renovations that involve structural changes take longer to complete than those that don’t.

Another factor to consider is the time to obtain a building permit. This can add significant time to the renovation timeline, especially for large projects. Building permits typically take a few days to a few months to process. This delay is often because local authorities must review applications and ensure the work complies with laws and safety regulations.

It is also important to remember that renovating is a long-term process. Renovating aims to increase a property’s value, improve its functionality, and enhance its aesthetics. It can also be a way to make repairs and improvements that aren’t possible or economical.

The length of a renovation project depends on the scope of the work, the number and type of contractors involved, and the materials needed. It generally takes 6-8 months to renovate a home. However, the timeframe can be shortened or extended by weather conditions. Additionally, it can be impacted by the time it takes to receive products and materials from overseas.

The best way to estimate the duration of a home renovation is to look at the previous renovation projects completed by your contractor or architect. This will help you determine how much time to budget for the project. You should also factor in warranties and defects liability periods.

A permit is a legal document that permits you to complete a renovation project. It ensures the work is done properly and complies with building codes and regulations. It also helps to keep your home safe. If you fail to get a permit, you could be fined or forced to do the work again.

If you are still determining whether you need a permit, it is best to talk to your local code official before beginning the work. They can give you advice and help you avoid costly mistakes. Moreover, they can help you plan your renovation to comply with the required code requirements.

Many projects require a permit, including installing new flooring or painting interiors. However, some, such as cosmetic or surface upgrades, don’t need a permit. These include paint, wallpaper, and floor resurfacing. Other examples of projects that don’t require a permit include changing the location of the bathroom or replacing plumbing fixtures.

For projects requiring a permit, you must submit drawings or specifications of the proposed work to the Department of Buildings (DOB). The DOB may review the documents and issue a conditional or final approval. This process can take up to a month, so submitting your documents promptly is important.

You can hire a professional architect or engineer to prepare your plans to save time. This will reduce the amount of time it takes to get the permit. The city also allows professionals to sign off on their plans for common home renovations (but not in landmarked buildings or when applying for a new certificate of occupancy). This process, known as self-certification, speeds up the permitting process by eliminating the need for the city to review the documents.

Homeowners often must update their home insurance coverage when they embark on renovation projects. This may cause a premium increase or decrease, depending on the type and value of the renovation. Homeowners must notify their insurance company before starting renovations so that the insurer can use its valuation tool to recalculate the cost of replacing or repairing a house and to verify whether existing coverage is adequate.

Adding a room, removing a wall, or upgrading from builder-grade materials to high-end ones could all affect the replacement cost of your home. This change can trigger a change in your policy’s dwelling coverage limit, determining how much of your home is covered under your policy. This may lead to an underinsurance issue in the case of a major disaster.

It’s also good for homeowners to confirm that any contractors they hire have the proper insurance coverage. This includes personal liability and workers’ compensation, which protects homeowners if a contractor becomes injured while working on their home.

If a contractor fails to carry the appropriate insurance, homeowners can often file claims against them through their homeowner’s insurance policies. However, if the damage is caused by poor artistry, homeowners usually need to approach the contractor directly and hope they will resolve the matter.

If your renovation will make your house temporarily uninhabitable, consider purchasing a temporary policy or adding an endorsement to your current homeowners insurance policy that covers dwelling under construction. This special policy will give you additional protection while you’re renovating and can help cover the costs of staying elsewhere if something goes wrong during your project.

Home renovation projects are an excellent way to increase a home’s value and make it more attractive. The renovation can involve various things, from painting the exterior to replacing outdated lighting. Regardless of the project’s scope, it is important to hire a reputable contractor to ensure the work is done correctly.

A reputable contractor will have extensive experience in construction and will be able to handle the specialized aspects of a renovation project. They can also coordinate with other parties, such as the architect or designer. They will also be able to obtain the necessary permits and ensure that the renovation is completed on time.

Getting referrals from friends and family before hiring someone for a home renovation is a good idea. It’s also a good idea to ask the contractor about problems they encountered during previous renovations. The answers to these questions will help you determine whether they do business correctly.

In addition to the general contractor, a renovation will require a team of professionals such as architects, engineers, and plumbers. These professionals may charge hourly or fixed fees for their services. They should be licensed and insured and provide a written estimate of the cost of their services.

A good renovation contractor will be able to provide you with an accurate quote for the project. Be sure to get quotes from several contractors and compare them carefully. Ask each contractor about their work methods, building materials, and timelines. Then, compare the prices to find the best deal. It would be best to look for a contractor that offers a warranty.

Residential Angle Masonry

Some older masonry structures use steel angle irons to support brickwork over openings such as doors and windows. These often sag or crack over time. Charleston Masonry allows structural engineers to determine if relieving angles are necessary for their buildings. This is a step in the right direction to save cost and time.

Masonry

Brick is known for its strength and longevity. Still, structural brick applications often require additional strengthening for a project to be successful. Many of these other applications involve the use of large L-angles. These L-angles are different from the typical angle iron used on most home projects and are sized to support heavy loads. They can be found in various applications, including supporting beams in building foundations and even helping keep cell phone and broadcast towers standing tall.

It is common to see concrete masonry structures with angle supports on their face, but less familiar are brick structures with these structural angles in the back. This angle supports a strong, durable backbone for these masonry structures. This helps keep the structure from buckling under the stress of a high wind load or the vibrations caused by the operation of nearby equipment.

These support angles are typically attached to the back side of the masonry wall through anchor bolts. This provides a solid connection to the concrete or masonry structure and allows for an effective transfer of forces to the adjacent walls. The connection through the angle also ensures that the mortar and brick do not break under heavy compressive loads.

Most masonry structures work in compression perpendicular to their bed joints. This is how they are tested to determine their compressive strength. However, it is more likely that a masonry wall will be subjected to a compression load at a non-perpendicular angle to the bed joints. In these cases, the mechanical properties of the masonry can vary greatly depending on the direction of the load.

This variation is called anisotropy and can cause significant strength loss. The correct design must be implemented to avoid these problems and to prevent the structural failure of the masonry construction.

It is possible to eliminate these problems with a rational veneer design and steel shelf angles. The alternative design procedures for masonry veneers in TMS 402 (Chapter 12) provide a step toward this goal by defining a minimum steel shelf angle length for each opening. This shelf angle offers vertical support to the masonry veneer while reducing thermal bridges by connecting it to the underlying structural system at discreet, evenly spaced points such as plate “blades,” allowing insulation to pass behind them.

The large L angles that are typically used to support beams and certain columns in building foundations and even towers for cell phone and broadcasting stations also offer great strength and help to keep masonry walls from crushing during windy conditions. However, if not properly designed and installed, they can be a source of serious construction problems that can compromise the performance of the overall wall system.

For example, using lipped bricks above shelf angles creates a gap between bricks that can allow moisture infiltration and expansion of the grout to crack the masonry units. Similarly, the placement of shelf angle anchors that are incompatible with the backup wall structure can create a thermal bridge between the backup wall and the masonry veneer and result in energy code compliance issues.

In addition to the concerns mentioned above, the use of steel shelf angles as a means to support masonry veneer on concrete and wood framing can result in spalling and cracking of the masonry veneer, corrosion of the shelf angle, deterioration of interior finishes, and water leaks. These failures are caused by various factors, including improper grade sizing, improper shimming, using mortar instead of concrete for filling the joints, inadequate masonry reinforcement, and the lack of adequate expansion space between the shelf angle and the backup wall structure.

Designers need to consider these and other issues when specifying brick masonry anchors. Several parties are involved in the design and installation of these anchors, which must be compatible with the structural and architectural requirements of the project. The designer of record, architect, and structural engineer should be involved in a pre-construction meeting to discuss the details and ensure that masons and laborers understand how the design works during installation.

In addition to the above concerns, additional considerations for anchoring masonry include openings in the wall and a change in bonding pattern. For example, suppose the masonry is constructed using a stack bond construction (masonry where the head joints in successive courses are offset by less than one-quarter of the unit length). In that case, MSJC requires that additional horizontal joint reinforcement be provided at 457 mm (18 in.) oc near this opening. Similarly, suppose the masonry is laid in a bonding pattern other than a running bond. In that case, this will also require additional horizontal joint reinforcement.

The design of masonry walls allows for a wide range of aesthetic effects. Inventive bond patterns, unit sizes, surface treatments, and color choices can create a feeling of strength, modernity, tradition, or even whimsy. These design features can add beauty to a building while remaining within code requirements for load-bearing masonry walls.

Concrete masonry walls interact with changing sunlight to visually present a variety of colors throughout the day, a characteristic that can be enhanced by coordinating electric lighting to accentuate the movement of light over the wall surfaces. The texture of a concrete masonry wall also adds to the aesthetic of a building, with fluted units adding an interest in the interplay of shadow and light.

While the code requirements for masonry construction are performance-based and do not directly address aesthetics, several design, construction, and inspection items can impact the masonry wall aesthetics. These include:

The selection of brick materials (including color and texture) and the color choice of mortar affect the visual appearance of masonry. Using mortar that contrasts with the color of the brick accentuates the masonry, including any imperfections in the material. Conversely, using mortar that compliments the masonry mutes any flaws in the material.

Masonry wall-lipped edge details also have a direct impact on the aesthetics of the masonry project. They can contribute to the overall quality of the installation. A poorly conceived lipped edge detail that does not provide a means for moisture or water to escape through the wall can result in spalling, cracking, and blistering of the masonry veneer. The design and installation of these elements must be carefully analyzed and detailed to ensure that the resulting appearance is as desired.

While not required by code, this guide recommends using sample panels and mock-ups to establish a project specification requirement for artistry and aesthetic standards for all masonry buildings. These pre-construction reviews help resolve conflicts in work quality, multi-trade coordination, and enclosure performance. They may also aid in the identification and resolution of problems before they result in significant costs to a construction schedule or budget.

Masonry requires proper maintenance to protect the integrity of a building. Leaving brick damaged or untreated can lead to serious structural problems and potential safety hazards. Fortunately, many ways exist to prevent masonry damage before it becomes a major problem. Masonry repair specialists can identify early warning signs, such as water infiltration through brick or stone walls, bowed bricks, and other structural issues affecting the entire structure.

The most common masonry issue is soil settlement. This happens when the ground surrounding your home begins to weaken and shift over time. This can be due to cycles of freezing and thawing or just seasonal changes in moisture that cause the soil to shrink or move. This can put a great deal of pressure on the brick and mortar in your wall, causing it to crack or cave in. A masonry expert can replace compacted bricks and install push piers to support the foundation if necessary.

Another common masonry problem is spalling, which is when the face of a brick begins to chip. This usually indicates that the shelf angle behind the brick has already started to rust. If left unattended, the shelf angle can break free and shift the weight of the brick to other parts of the wall or even the foundation. A masonry specialist can remove the corroded shelf angle and install a new one to restore the structural strength of the wall.

Masonry maintenance can also include tuckpointing, which is repairing deteriorated mortar joints. This can be a very effective way to prolong the life of your masonry and enhance its aesthetics. However, it is important to use the right type of mortar for your project. Your masonry contractor should be able to provide you with a mortar analysis and recommend the correct type of mortar for your specific application.

For the best possible results, choose a company that is skilled in both tuckpointing and masonry restoration. This will ensure that your masonry repairs are done properly and to the highest quality standards.

How to Spot Electrical Repair Issues in Your Home

From outlets and switches to lighting and fixtures, most electrical components require repair occasionally. If left unattended, however, these repairs can become dangerous and lead to costly long-term issues.

Thankfully, professional electrical repair companies can quickly identify potential fire hazards and resolve them before they get out of hand. Contact Electrician Delray Beach for professional help.

electrical

Over time, the contact points in an outlet’s receptacle will wear down, loosening up to where they can no longer grip the prongs of a standard plug. This can cause the outlet to become loose or even fall out of the wall socket. While this may not seem like a big deal at first, it’s important to fix loose outlets as soon as possible because they can create a fire hazard.

Fortunately, loose outlets are usually quite easy to fix. Most can be repaired in just a few minutes for less than $5. First, ensure all power is cut off to the outlet by flipping the breaker switch for the circuit it connects to. Then, verify that there is no electricity flowing to the receptacle by using a non-contact voltage tester. Once you are sure that the power is off, unscrew and remove the receptacle.

If the outlet is still very loose, tighten it by screwing in a new outlet shim. These are available at hardware stores and can be used to fill the gaps between an outlet’s screws and the electrical box’s holes. Once the shims are in, replace and lock the outlet and then test it to ensure that it sits snugly in the outlet hole.

Loose outlets can be a serious safety hazard, particularly in homes with young children. They can easily be pulled out or pushed back in, creating dangerous arcing that could lead to an electrical fire.

If you notice that an outlet is becoming loose, call a professional electrician right away. Don’t try to fix it yourself, as this can be very dangerous and could lead to more costly repairs in the future. An experienced, accredited electrician will be able to fix the problem quickly and safely. This will also help prevent any additional damage to your home or office from occurring, such as wires catching on something and causing a fire. Getting this issue fixed as soon as possible can greatly improve the safety of your family and employees. ElectriCall can help with all of your electrical needs.

Flickering Lights

Seeing the lights flicker in your home isn’t just annoying; it could be an indication that your electrical system has serious problems that need to be addressed immediately. While a light that flickers occasionally isn’t necessarily an issue, consistent and severe flickering can put your family’s safety in jeopardy.

Flickering lights can signal a number of different issues in your home’s wiring, including switch failures, loose fixture wiring and worn connectors on the breaker box. If the problem is only affecting one light fixture, it may be as simple as replacing the light bulb with a higher wattage and making sure that the fixture’s socket is properly tightened. If the problem is spread throughout your house, it might be a sign that your circuit breaker has overloaded due to multiple appliances or other reasons. Putting your appliances and devices on dedicated circuits and using power strips can help limit the amount of current that goes through each individual outlet.

If the problem is confined to a single room, it might be as simple as having outdated or damaged wiring. The insulation in old wires can deteriorate over time, and the resulting gaps create an electrical hazard that can cause arcing and overheating. This is a major fire hazard and requires immediate attention from an electrician.

A professional electrician will check your entire house’s wiring for signs of this type of problem. They’ll search for broken or disconnected wires, old or outdated breakers, switches and connectors. Flickering lighting is a serious fire hazard that can lead to deadly results if left untreated.

If you’re unsure of the cause of your flickering lights, or the situation has become worse over time, it’s important to contact a licensed and experienced electrician right away. They’ll be able to diagnose and repair the source of the problem. Failing to do so will result in unsafe and expensive damage to your property, as well as a possible danger to your family’s safety and health. Flickering lights can also be a symptom of more serious underlying issues that require immediate attention, such as a faulty electrical system or even an underground fault.

Dead Circuits

If your circuit breakers keep tripping or your lights are flickering, you may have a lasting short circuit problem. This type of electrical issue stems from an established pathway of electricity getting cut, which can lead to a fire or death to humans and damage to appliances. Fixing it involves determining where in the circuit the dead short is occurring and replacing the faulty wires with new ones.

Generally, the first thing you should do is unplug everything from the affected outlet to prevent overloading it. Then you should inspect the outlets, switches and light fixtures in the area for burns or scorch marks. This is because a dead short often results in showers of sparks.

Next, it’s time to flip the main breaker switch to the off position to work on the affected circuit safely. After that, you should carefully examine the fuses or breakers in your electric panel to find which one is blown or tripped.

In most homes, each breaker is assigned to one particular circuit. You can tell which circuit it belongs to by looking at the breaker’s handle, which typically sticks somewhere between on and off. Some fuses are labeled by color, so you can quickly spot which fuse has burned out or tripped.

Once you’ve determined which breaker or fuse is faulty, you should purchase a replacement from an electrical supply store or hardware store. Make sure the replacement is of the same size and amperage as the old one. It is a good idea to test the replacement before installing it to ensure it works properly.

When replacing a fuse or breaker, you will need to strip off some of the insulation on the end of each wire and connect it to the screw terminal. It is important to use the right tools for this job to ensure that the connection is safe and secure.

After you have replaced the faulty fuse or breaker, switch it back on and test the outlet. If it doesn’t work, you may have a more serious problem that needs a professional.

Backstabbed Outlets

Backstabbed outlets are a common problem found in homes and commercial buildings. They occur when the neutral (white) and hot (red, blue or yellow) wires get pushed into holes behind the outlet instead of being anchored to screws on the side of the outlet. This practice was used by electricians in the past to save time when installing receptacles and switches. However, this shortcut has since been discovered to be dangerous and should be avoided. If your home has stabbed outlets, it is important to have a licensed professional electrician check and repair them as needed.

During the 1970s and 1980s, some electricians wired receptacles with holes in the back to which they stabbed stripped ends of electrical wires. These receptacles, called stab-in receptacles, allowed them to skip the step of bending wire ends into a “U” shape with long-nose pliers and tightening them down under side screws. This method of wiring became popular because it was quicker and cheaper. However, over time the spring-metal grippers on the back of stab-in receptacles loosen and can cause wires to come unattached from the receptacle. This can result in power damage or even an electrical fire.

If you have stabbed outlets, they can be checked and repaired by turning off the power at the breaker box and removing the cover plate of the outlet. Look for signs of stabbed wires such as a melted back of the outlet or a loose and bare wire. If you find any of these, a qualified electrician can remove the receptacle from the outlet box, inspect and replace the faulty receptacle and rewire the circuit.

If you have AFCI breakers, your electrician can also use this opportunity to inspect and replace any backstabbed outlets with new, properly wired devices that are rated for the size of the conductors. This can help prevent arcing, which causes circuit breakers to trip repeatedly and possibly lead to electrical fires. AFCI breakers are designed to detect small arcs and shut down the entire circuit before they can damage your home or start a fire.

Why It’s Important to Have Asbestos Removal Done Properly

Asbestos is a dangerous material, and it can cause serious conditions when inhaled. The microscopic fibers can stay in the lungs and lead to breathing difficulties and cancer.

Only a professional Asbestos Removal WA should perform self-removal. They will get a demolition permit and follow local, state, and federal regulations.

Asbestos is a naturally occurring material used in various building products and construction materials. The problem is that when asbestos fibers are released, they can be inhaled into the lungs, leading to various medical issues, including lung cancer, asbestosis (a scarring of the lungs), and mesothelioma (cancer of the lining of the lungs). Because of this, it is important to watch for potential asbestos in your home or business.

You won’t be able to see asbestos with your naked eye, but you may be able to identify a suspected asbestos-containing material by its texture and color. Asbestos fibers are very thin and can be woven into other materials to create various colors and textures. Generally, asbestos-containing materials are blue, brown, or white and often crumble easily if touched.

While you are unlikely to find asbestos in a bathroom, it is still worth checking the walls and ceilings for it. Asbestos was a popular insulation material because of its fireproofing properties, and it was also added to many building products such as paints, floor tiles, adhesives, Artex, and textured decorative coatings on walls and ceilings (Artex).

It is also worth checking the materials in other areas of your house for asbestos. For example, asbestos was often used in corrugated roofing and wall cladding, as well as in soffit material and door frames. It was also commonly used in vermiculite insulation and as thermal insulation wrap on pipes and boilers (these look like shiny accordion-like pebbles).

If you suspect you have any suspected asbestos in your home, don’t touch it. Instead, contact an asbestos removal specialist to survey the material and have it tested. Once the results are known, a properly trained asbestos removalist can remove the material safely. If the material is not brittle, it will need to be sealed and bagged and should be placed in a secure waste container for disposal. If the material is deemed flaky, it must be removed in an enclosed work area with air-supplied or air-purifying respiratory protection that filters asbestos fibers fitted to each worker individually. Disposable coveralls, hoods that prevent penetration of asbestos fibers, and impermeable gloves are also required.

Unless you have the right training and experience, it’s best to let a professional take samples. Doing it yourself can cause a greater risk of spreading debris and potentially exposing yourself to asbestos dust.

It’s also important to only sample material that you will not disturb during the cleaning and disposal process. Material that is in good condition and will not be disturbed should be left alone, even if it’s suspected of having asbestos.

If you must take a sample, wear personal protective equipment (RPE), including a face mask, disposable gloves, and rubber boots. Shut down any heating or cooling systems and do the sampling on a non-windy day. Spread a plastic drop sheet on the ground to catch any materials that may fall during the sampling process. Wet the area using a spray bottle with a small amount of water and a few drops of detergent before taking a sample to reduce the release of asbestos fibers.

To get a representative sample, cut, break, pinch, scrape, or gather a small amount of the building material — a tablespoon or quarter size is typically enough. Sample an inconspicuous place, such as a closet or corner.

If the material is bonded, it will not release asbestos unless disturbed or damaged, but if it’s friable, it can release fibers into the air. Related asbestos-containing materials include a range of household products, such as duct tape, drywall compound, floor, wall, ceiling tile, cement pipe, and attic insulation, which can be made from either cellulose or vermiculite.

The EPA recommends at least three samples of a homogenous material to determine if it contains asbestos. When evaluating asbestos-containing materials, bulk sampling is preferred over spot testing because it allows the laboratory to see how the material looks as a whole rather than just one small section.

If the sample shows the presence of asbestos, the material is considered ACM. A professional laboratory can evaluate the sample to determine the type and level of asbestos, which is important for proper disposal. The EPA requires any material that contains asbestos to be sent to an approved waste facility for processing.

Asbestos is no longer a common building material, but it lingers in many structures. It can be dangerous if the fibers become airborne and inhaled, so it’s important to hire a professional asbestos abatement contractor for any work that could disturb the material. The abatement process includes both removal and encapsulation.

Before starting any asbestos abatement, the contractor will perform an on-site evaluation. During this evaluation, they will explain how they plan to set up containment and decontamination areas. They will also discuss how they will clean up and the timeline for the entire project. They will need to obtain a permit from the Environmental Health and Safety Department before beginning any work on the project.

Once the work begins, contractors will isolate the area with plastic and turn off the heating and cooling system. This will ensure that dust doesn’t spread throughout the house. Asbestos abatement contractors will wear disposable suits and hoods, gloves, shoe covers, and respirators. They will also monitor air quality outside the work area. This is done to ensure no asbestos fibers enter the non-abatement areas.

During the asbestos abatement process, workers will remove any material that contains asbestos from surfaces and substrates. They may also encapsulate certain materials, such as pipe lagging, with a sealant. The contractors will then clean the area and leave it ready for re-inspection. Once the work is complete, the reduction and inspection professionals will help you create a preventive plan for your home.

When hiring an asbestos abatement company, ensure they have a proven track record of providing high-quality work. They should be licensed and insured, and they should be able to provide a list of references. The contractor should be willing to go over their work history and explain how they will protect you and your family from harm.

It is also a good idea to ask the asbestos abatement contractor for a copy of their permit and insurance information before hiring them. This will give you peace of mind that they are a legitimate business. Additionally, you can contact regulatory inspectors to verify that they have the necessary permits for your project.

Asbestos-containing materials must be disposed of carefully to protect public health, safety, and the environment. This includes identifying all ACMs, properly labeling and warning signage, wetting waste materials to reduce the risk of fibers spreading if the container breaks, and using only leakproof containers such as plastic bags of six mil thickness or thicker containers or sheeting.

All workers should wear personal protective equipment (PPE), including gloves, respirators, and eye protection. They should also use a HEPA (high-efficiency particulate air) vacuum cleaner to clean the work area after each step. It is important to keep work areas separate from uncontaminated spaces. This can be done by physically closing the work area or sealing it with tarps and heavy-duty adhesives.

Disposal involves taking the asbestos waste away from the generation site and placing it in a designated place where it will not be disturbed or contaminated. The process is called “presentation for storage.” It starts when the waste is moved from the generation site into a holding location and continues until it is taken to another location for disposal.

In most cases, a permit is required to perform demolition work that includes the removal of asbestos. The permit must be obtained from the local building or permitting department. The permit will require a specific plan to be submitted that outlines how the asbestos will be removed and where it will be sent for disposal.

The type of disposal method used will depend on the material, its condition, and the state or local regulations. Some options include blending, milling, or crushing the waste material into a nonhazardous product that can be reused in construction or other applications. Many recycling methods also significantly reduce the volume of asbestos waste, which helps save landfill space and lowers disposal costs since pricing is often based on volume. Moreover, these recycling processes help prevent the dumping of asbestos in landfills, which shields landfill workers from exposure.

Navigation